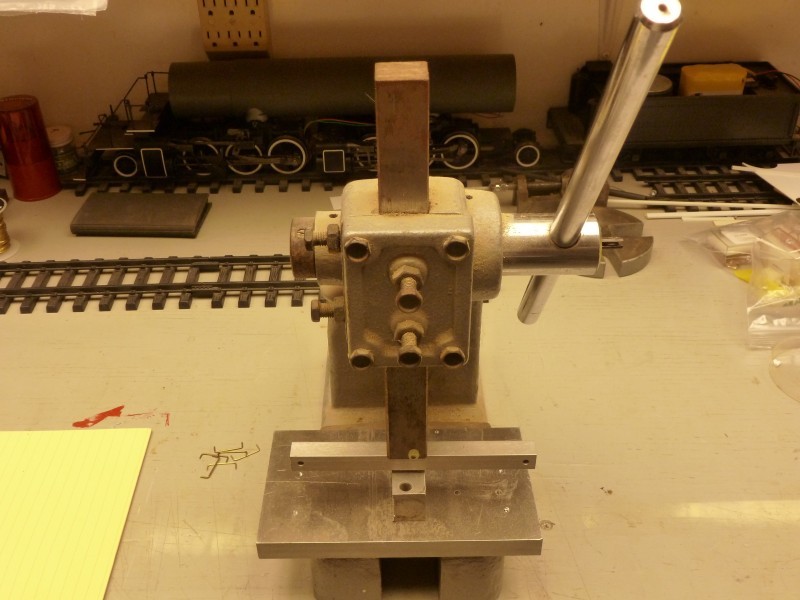
A tool for forming grab irons.
The most numerous cars on the RC&G are 3 bay steel hoppers and for
these I use the Bachmann 1/22 scale hoppers that are roughly based on
the cars used by the East Broad Top Railroad. I have quite a few of
these and many were acquired used which had broken or missing grab
irons. Early on I tried using white metal castings from Ozark for these
but the bent too easily in use. I eventually decided to use a more
simplified replacement design which is just a simple 'U' shaped piece of
brass wire looking much like a staple. If the situation had been such
that I only needed enough for a car or two I would have just bent them
by hand using pliers but I decided once I started that I wanted to equip
all the hoppers with them and for that I would need some sort of tool.
each hopper has 22 grab irons of the same size plus two longer ones. The
longer ones I could bend by hand but for others 30+ hoppers I would need
660+ of them.
I
decided I would start with an arbor press that I already have. These are
fairly common and not all that expensive (except for shipping as they
are quite heavy) and can be found at places like Harbor Freight. The
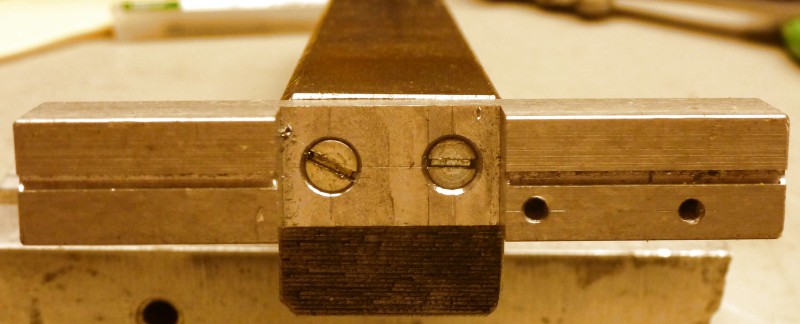
photo below shows the basic arbor press and the pieces I would use to
make the tooling.
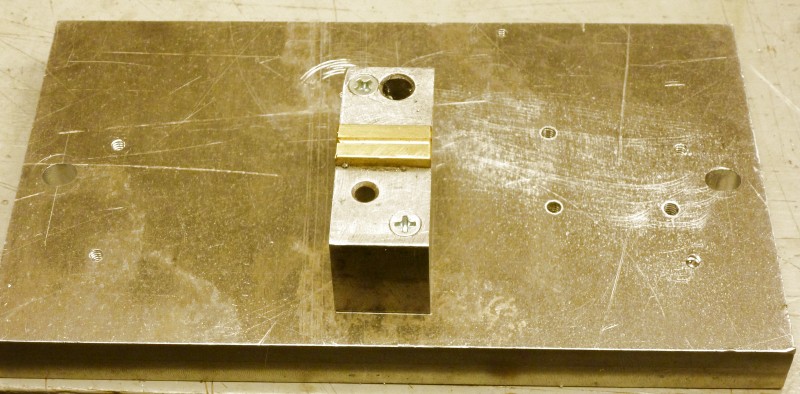
The
first step was to build the die. This is a piece of brass that as a
groove milled in it using a ball end mill and the groove is close in
width to the size of the wire I will be forming. The ends of the groove
were rounded over to provide a radius for the bend. This needed to be
mounted to a solid base and elevated to provide clearance for the ends
of the grab when it was bent. While this would be subjected to a lot of
downward force it would see very little if any side force so the brass
piece was just super glued to a block of aluminum. The block was then
mounted to a 1/2" thick piece of aluminum tooling plate.
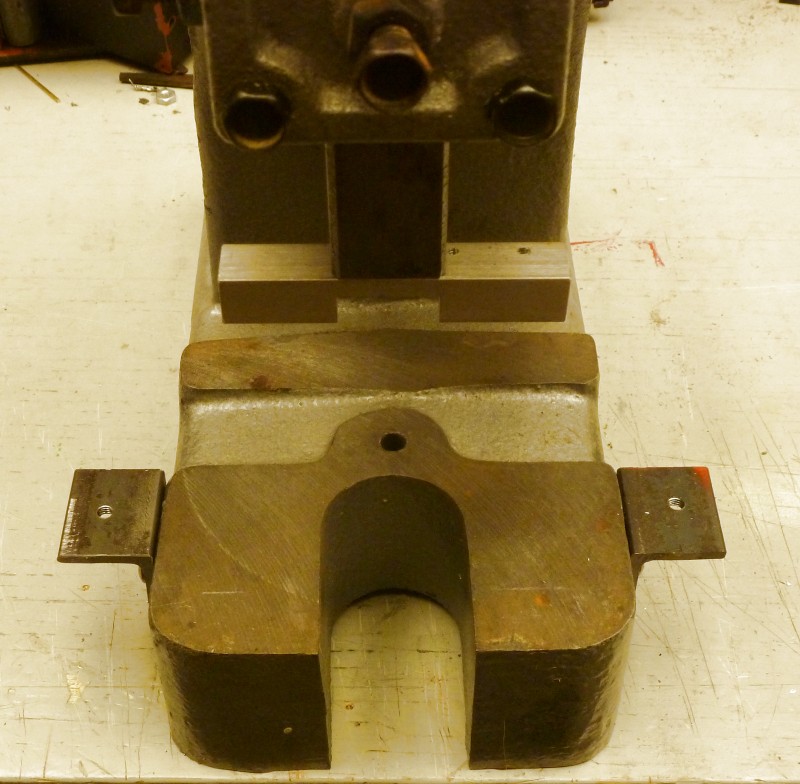
The
base of the arbor press had no usable mounting holes and drilling them
with a drill press or even hand drill wasn't possible due to the head of
the arbor press being in the way. So two piece of angle iron were bolted
to the sides of the base which was drilled and tapped to accept them.
This then provided a mounting for the plate with the die on it.
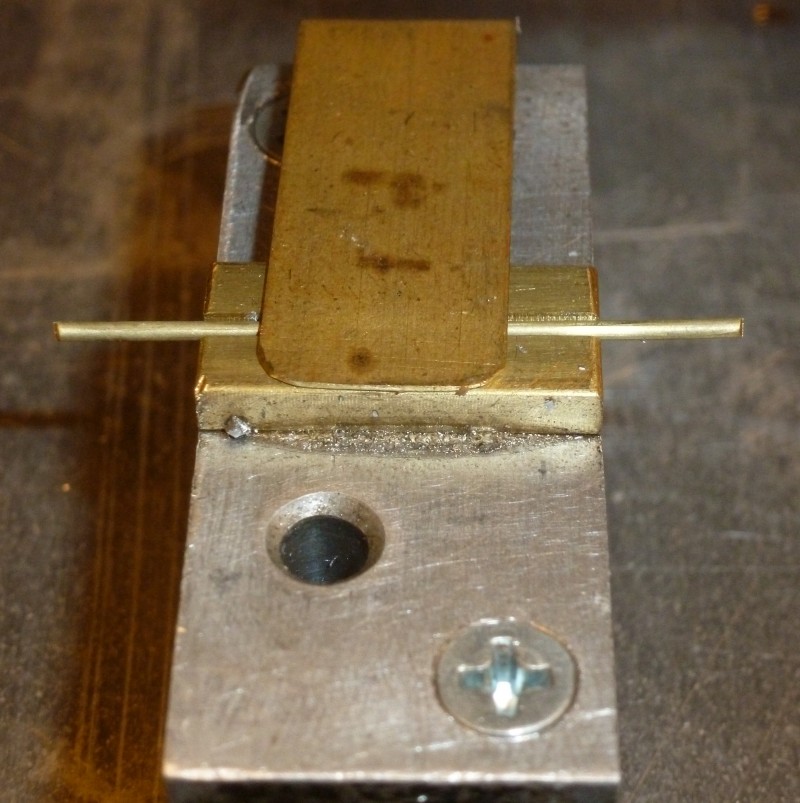
I
drilled the mounting holes for the base a little oversize to allow some
wiggle room to align the two die halves. The next photo shows the plate
mounted to the base of the press. The brass piece on top of the die is a
piece of thin stock that was bent and screwed to the back of the
aluminum block. It is bent to provide some downward force on the die
which hold the wire to be bent in place.
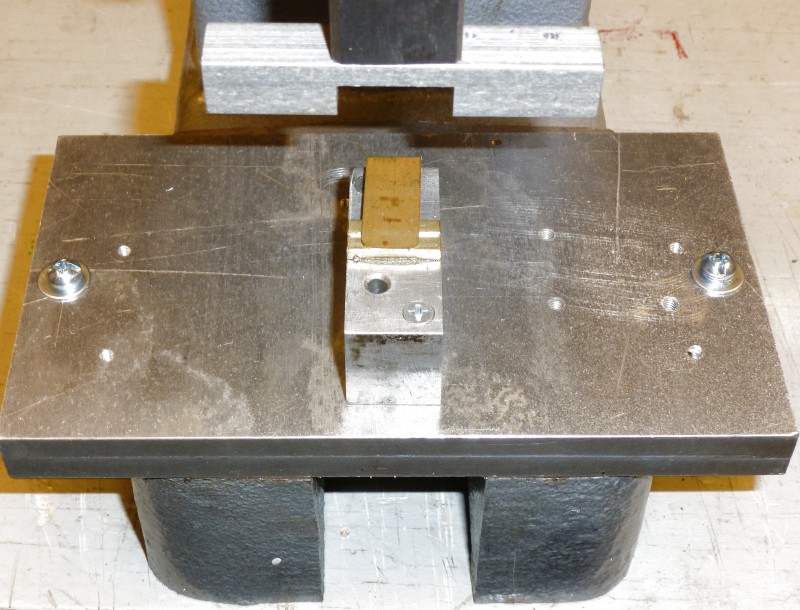
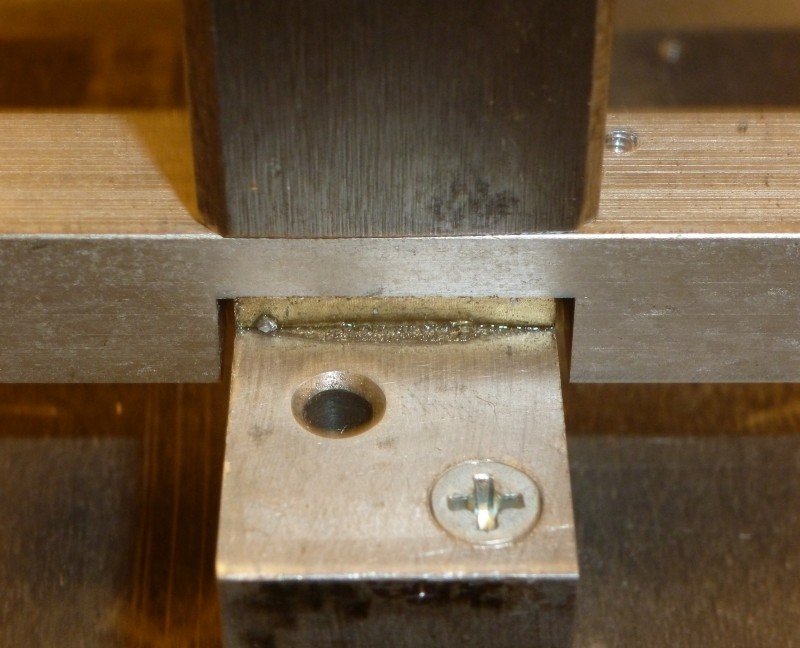
The
next photo shows the other half of the tooling looking up from the
bottom. I had to take the arbor out of the press to drill mounting holes
in the end of it to mount the die. It's made from a piece of aluminum
bar stock that was milled out in the center to fit over the lower die
with just enough clearance for the diameter of the wire on both sides. A
groove was milled across the bottom to help align the wire with the slot
in the bottom die. This die was secured using counter sunk screws so no
adjustment is available. Any minor tweaking was done with the bottom die
mounting plate.
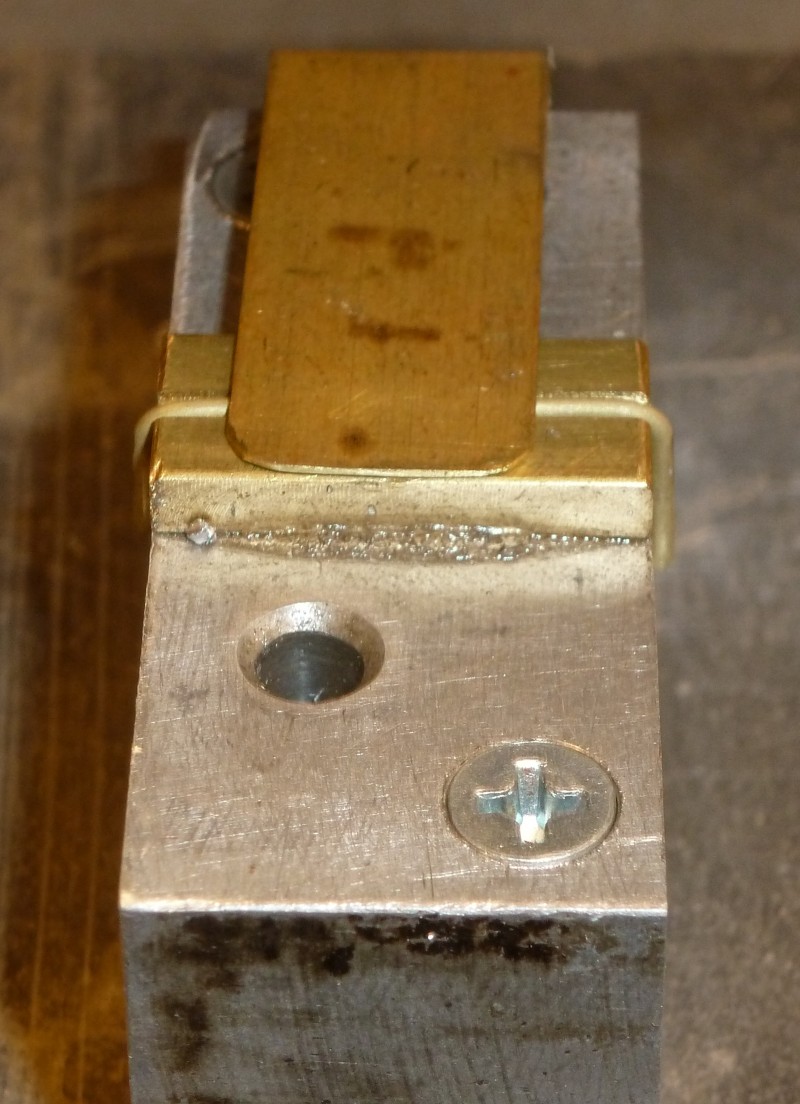
The
next photo starts the process of forming the wire. A piece of wire cut
to the correct length is placed in the die. The wire sits slightly proud
of the groove so the brass strip holds it in place and the wire is
centered by eyeball. For my purpose that's close enough.
The
arbor is then brought down fully against the bottom die. The arbor is
quite heavy and not counter balanced in any way so little force is
required to bend the wire.
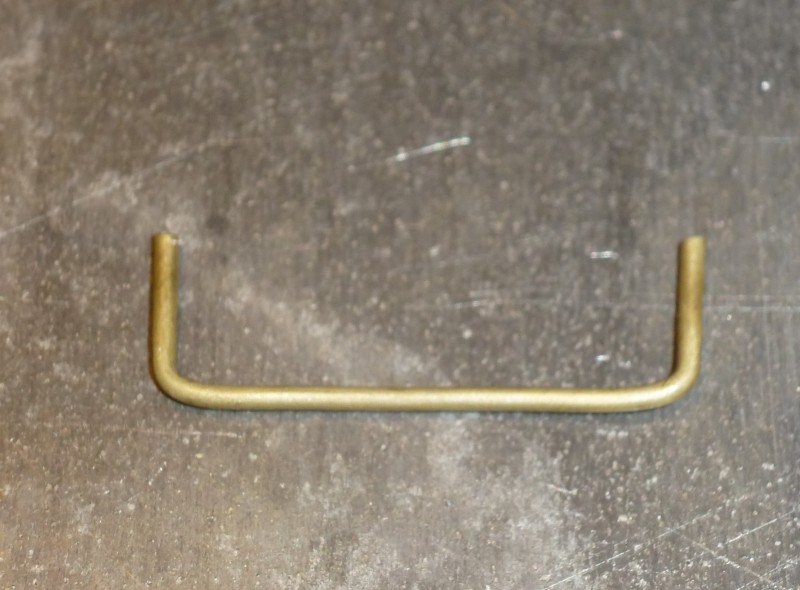
When
the arbor is raised you have a formed grab iron.
Even
though this is a soft brass wire it still springs back a little when the
die is raised so the sides aren't perfectly perpendicular but that
slight spring out helps hold the grab in place when installing and I
usually use some thin super glue flowed in around the mounting holes to
keep in place on the car.
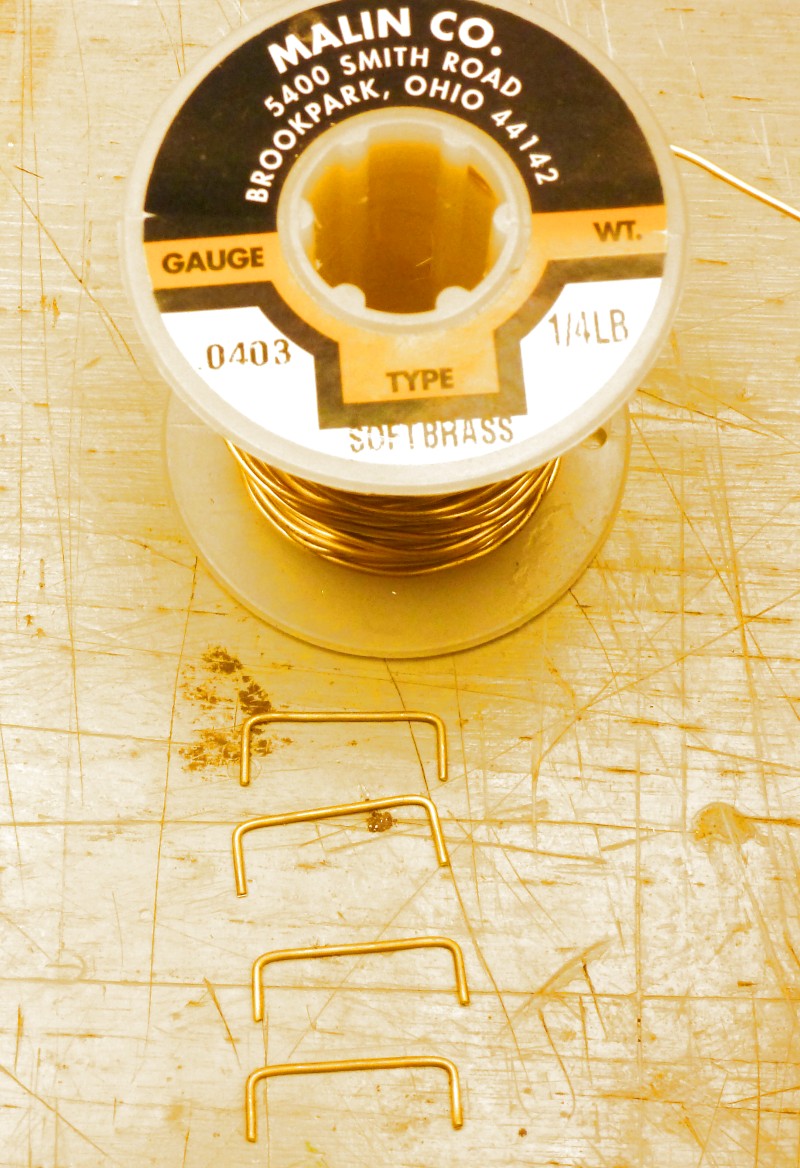
I
couldn't find any wire the size I needed already straightened so I ended
up buy a coil from McMaster-Carr, my go to online hardware store. To
straighten the wire I cut it to the desired length then tape a sheet of
fine grit sandpaper to a flat surface. I then place the wire piece on
the paper all facing the same direction and and using a rubber sanding
block roll them back and forth a few time between the paper and the
block applying some force while doing so. This usually takes any kinks
out. I also tends to roughen the surface of the brass which improves
paint adhesion.
I'm
sure there are many other ways to do this, a modified set of pliers
would work but I think my method is quicker and easier on my carpel
tunnel affected hands. Once you have a good supply of wires cut to
length this really goes quite quickly.
If
you have any question feel free to email me.